How to Clean the Spreader on a Hessaire MC18M Air Cooler
It seems counterintuitive to use an air cooler in a humid environment, but the cooler lowers the temperature in my horse’s shed by 10 degrees. He loves it.
Adding ice to the water a couple of times a day on the 100-degree days blows colder air on his face, which also helps.
The main drawback is the unit has a plastic spreader secured inside at the top that is designed to spread the water to the media pad (honey comb block on the back) in a half circle, but the spreader tends to get clogged with dirt over several weeks.
This can cause the unit to work too hard, tripping the electric circuit. Or it can send all the water to one area of the media pad, which leads to the unit spitting the water out the front and going through all the water in a couple of hours, rather than the usual half day.
Cleaning the spreader is easy, as is accessing it.
If I can do this, anyone can.
Get a Phillips screwdriver, a flathead screwdriver and maybe a small plastic bag to keep track of your screws and the drain plug. Optionally, have a vacuum with hand tools or a shop vac ready to clean the media pad at the end.
Steps to clean the Hessaire MC18M Air Cooler spreader
Unplug the cooler from its power source.
Move it somewhere where you can drain the water.
There are two options for draining the water. I’m sure the manufacturer would recommend removing the plug at the bottom of the unit and allowing the water to drain.
It’s much quicker to remove the media pad from the back (next step) and tip the unit backward to dump out the water. That’s my method of choice.
Remove the two Phillips screws holding on the back plastic frame of the unit; the media pad is attached to this piece. Put the screws in the bag before you take off the back. Those screws come flying out of the holes if you pull off the back without removing them completely.
Use the flathead screwdriver to pop the back loose if it won’t come off easily.
This next section was edited on July 18, 2022, to recommend loosening only one handle screw and not removing the whole handle.
Cleaning the spreader requires loosening one handle screw so you can rotate out the spreader.
Lift up the handle and flip up one of the plastic tabs covering the two screws, again using the flathead screwdriver, if necessary.
Unscrew the screw until the handle separates from the unit on that side, but don’t remove the screw from the handle.

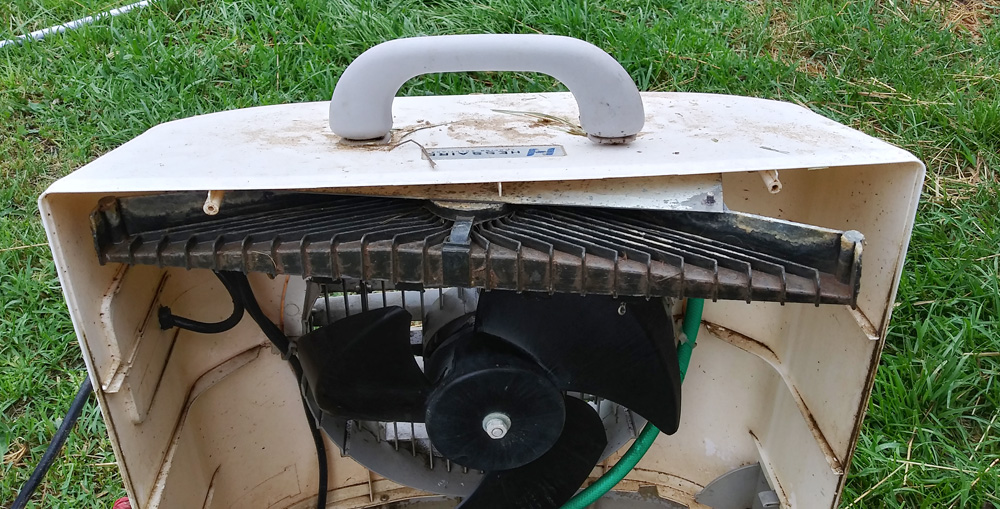
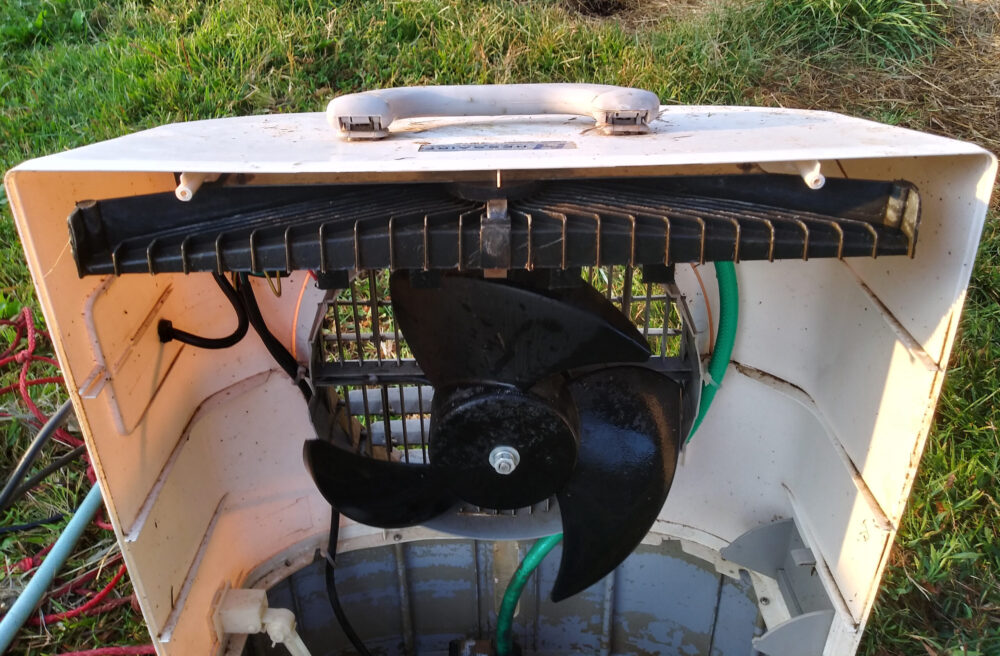
The Hessaire MC18M air cooler with handle removed on one side, so the plastic spreader and metal piece holding it in place can be rotated out of the unit.
Slide out the the metal plate and plastic spreader assembly that the screw was securing on one side.
Unscrew the screw holding the metal plate to the plastic spreader until those pieces separate. Again, don’t remove the screw. It’s easiest to get to the screw head by lying the spreader on the ground.

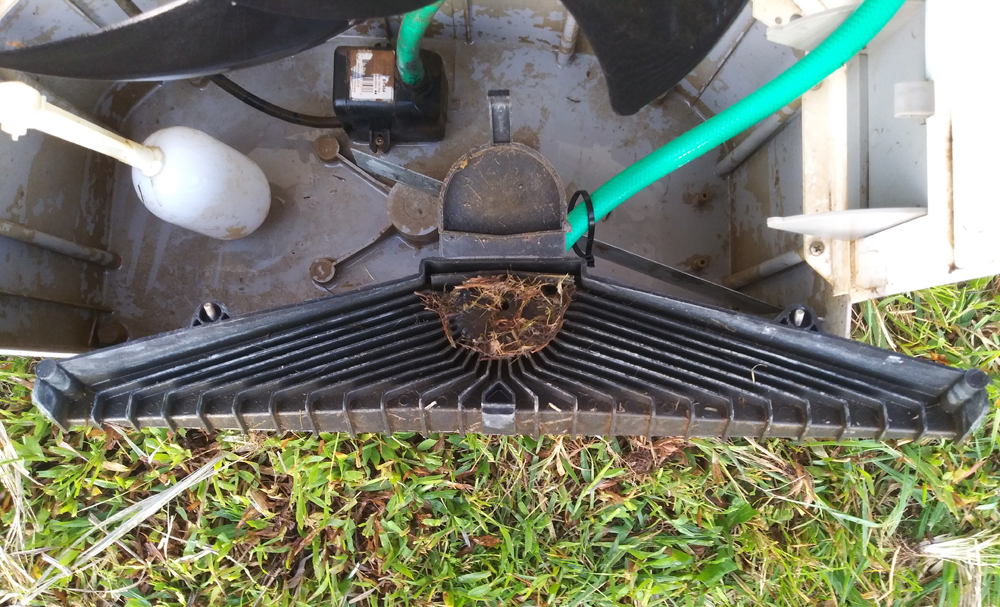
This photo shows the Hessaire MC18M plastic spreader fully removed. I’m no longer recommending removing the spreader to access it. But it’s a good photo of the cap you’re trying to open. Opening the cap reveals the dirt and debris clogging the part.
Flip up the almost unnoticeable plastic cap at the center of the spreader. The gunk preventing the spreader from working is likely under the cap.
Spray the spreader with a hose to get out all the gunk.
Reassemble the spreader with the metal plate and then reattach the handle to the unit by aligning the the screw with the hole and tightening it.
Vacuum the media pad, if it is dry, to get the unit in top shape. If the media pad is wet, spray it with a strong hose spray. I wouldn’t recommend vacuuming a wet media pad with a regular vacuum (I speak from experience), but you could do so with a shop vac.
Reattach the media pad to the unit with the screws you took out earlier.
Replace the plug at the bottom of the unit, if you removed it, and refill the unit with water.
Plug in the unit to see if it is working properly.
I also have broken and replaced the fan on these units. I thought that replacement process was easy, as well.
My horse’s air cooler runs from at least May to September, mostly 24 hours a day.
It works hard, and I need to be able to clean it.
I appreciate the ease with which I can get to the spreader.
I have no affiliation with Hessaire and get nothing for this tutorial. This is not an affiliate marketing post.
It took me a long time in 2019 to figure out that cleaning the spreader would fix my failing unit and then more time to figure out how to get to the spreader. I wanted to share this info with anyone with this unit. It’s a very simple process and does not require professional assistance.
The manual for the unit doesn’t list or show the spreader as a part in the illustration, but it does say that cleaning the spreader fixes several issues.
